Python programming is very simple, the language is versatile and Python has features that, although simple to use, make learning very fun. And using the combination Python Flask you can create a very powerful application.
In this tutorial, we will build an API, or a web service, for a ToDo app written in React. The API service will be implemented using a REST-based architecture.
Our application will have the following main features:
In this tutorial, we will focus only on the Back-end part of the application, so if you want to create your application front-end, I strongly recommend you to visit this article, where I teach step by step how to create a ToDo list using React. It’s with that front-end that we’ll work on this tutorial.
Let’s get to know our main tool for this project.
Flask is a micro-framework for Python web application development. Flask is a do-it-yourself type, it does not restrict the structure of your application in any particular way. It provides greater flexibility and control to developers. Flask provides the basic tools to create a web application.
Flask is part of the micro-frameworks categories. Micro-frameworks are usually frameworks with little or no dependence on external libraries.
This has pros and cons. Pros would be that the framework is lightweight, there is little dependency to upgrade which can ensure extra points in security and stability, cons is that some time you will have to do more work alone or increase the list of dependencies by adding plugins. In Flask’s case, its dependencies are:
Before installing the framework I strongly recommend that you create a virtual environment for your application. If you intend to work with Python, this should always be one of the first things to do, if you don’t know how to do it, I also have here another post that teaches you step by step, everything you need to know about virtual environments in Python
Once this is done, we can then install the framework within our virtual environment by running the command:
pip install Flask
Let’s quickly set up Flask and run a web server on our local machine. Create a file named main.py in the todo_service folder and insert this code.
from flask import Flask
app = Flask(__name__)
@app.route('/')
def hello_world():
    return 'Hello World!'
After Flask’s importation, we created a route. A route, in Flask, is specified by:
Nós vinculamos essa rota com uma função Python que será invocada toda vez que essa URL for requisitada via HTTP. Neste caso, nós configuramos a rota raiz (/) para que ela possa ser acessada pelo padrão URL http://localhost:5000/.
With that we can run our server now. Flask is very simple with that too, just run the command below in your terminal:
FLASK_APP=main.py flask run
this message should appear on your console:
Running on http://127.0.0.1:5000/ (Press CTRL+C to quit)
Okay, the first step has been taken, we already have a server running and our first route set. If you want, you can use Postman to test it.
As you will notice throughout this post, Python programming is quite simple, and Flaks doesn’t make things complicated.
What we need to do now, is set our routes, the routes will be:
To keep things simple, we’ll write all our routes in a single file, although this isn’t always a good practice, especially for very large applications.
from flask import Flask
app = Flask(__name__)
app.run(debug=True)
@app.route('/todo/getall',methods=['GET'])
def getTasks():
    return 'Get all taks!'
@app.route('/todo/create',methods=['POST'])
def createTask():
    return 'Create new task'
@app.route('/todo/update',methods=['UPDATE'])
def updateTask():
    return 'Update Task'
@app.route('/todo/delete',methods=['DELETE'])
def deleteTask():
    return 'Delete task'
We will also create a JSON file to represent our task list, but we have another post here that shows how to connect your Python project to the MySQL database.
Create a new file, in the same directory, with the name tasks.json. That’s gonna be our initial task list:
[
   { "complete": false, "task": "Read about MongoDb" },
   { "complete": false, "task": "Create a React ToDo App" },
   { "complete": false, "task": "Find my key" }
 ]
Once you’re comfortable with this initial Flask framework, you can restructure your application any way you want.
Vamos começar enviando a nossa lista de tarefas para o usuário quando ele consultar a rota todo/getall. Para fazer isso precisamos importa duas bibliotecas que vai nos permitir trabalhar com JSON, jsonfy e json
Let’s start by sending our task list to the user when he accesses the route todo/getall. To do this we need two libraries that will allow us to work with JSON, jsonfy and json, let’s import them.
from flask import Flask
from flask import jsonify
import json
app = Flask(__name__)
app.run(debug=True)
# read file
with open('tasks.json', 'r') as myfile:
    data=myfile.read()
# parse file
obj = json.loads(data)
@app.route('/todo/getall',methods=['GET'])
def getTasks():
    return jsonify(obj)
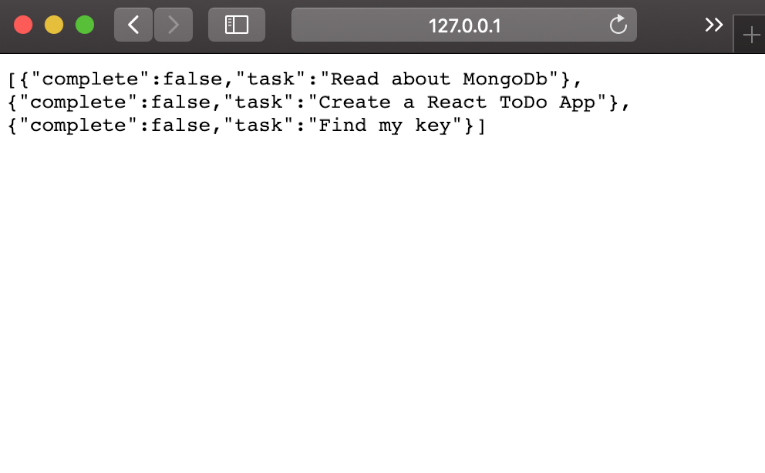
If you access the route http://127.0.0.1:5000/todo/getall or use Postman you will see a result like this:
Now let’s make our React front-end receive these tasks, let’s make some changes to your App.js file, let’s use one more Hook, useEffect() to request our list.
import React, { useState, useEffect } from 'react';
import './App.css';
import TodoList from './components/TodoList';
import TodoForm from './components/TodoForm';
function App() {
   const [todos, setTodos] = useState([]);
   useEffect(() => {
      const fetchTasks = async () => {
         let response = await fetch('http://localhost:5000/todo/getall'
         );
         if (response.ok) { // if HTTP-status is 200-299
            // get the task lists
            let json = await response.json();
            setTodos(json);
         } else {
            alert("HTTP-Error: " + response.status);
         }
      }
      fetchTasks();
   }, [])
   return (
      <div className="App">
         <TodoForm addTodo={(todo) => {
            if (todo.task.trim().length > 0) {
               setTodos([...todos, todo]);
            }
         }} />
         <TodoList todos={todos} updateTodos={(list) => { setTodos(list) }}></TodoList>
      </div>
   );
}
export default App;
If you have no idea where this code came from, I suggest you check out this post, where you have all the front end code we are using.
It’s very likely that you will have some problems with CORS, which is easily solved in Flask by installing a small library that solves this problem. Install the library with the command:
$pip install -U flask-cors
After that, include these two lines in your main.py file.
from flask import Flask
from flask import jsonify
import json
from flask_cors import CORS #include this line
app = Flask(__name__)
app.run(debug=True)
CORS(app) # include this line
Now let’s run our React application to see the result, use the npm start command in the project folder to start.

Our application continues to work as before. and if we look at Chrome Developer Tools we’ll see that the tasks are already coming from the Flask server. Success!
To create a new task in our list we will use the POST method. We need to add the new item to the list and return to the user.
In our main.py file, we will change the route todo/create. We will define a function that will receive the value from the user, add to the array, and return the item to the user, indicating that the operation was successful.
@app.route('/todo/create', methods=['POST'])
def createTask():
    # Get item from the POST body
    req_data = request.get_json()
    obj.append(req_data)
    return jsonify(req_data)
On the front end side what we need to do is modify our TodoForm.js file. We will include a function that will submit, asynchronously, the item that you type in the form. This is the submit function:
   async function postData(url = '', data = {}) {
      const response = await fetch(url, {
         method: 'POST',
         headers: {
            'Content-Type': 'application/json'
         },
         body: JSON.stringify(data)
      });
      return response.json();
   }
And we’ll call the this function in our handleSubmit method this way:
   const handleSubmit = async e => {
      e.preventDefault();
      if (!userInput) return;
      await postData('http://localhost:5000/todo/create',
        { complete: false, task: userInput })
        .then(data => {
            addTodo(data);
            setUserInput("");
         })
   };
Our application will be working like this at the moment:

To delete an item from the list, we’ll send an object containing the item, we’ll search within the list, on the server, if the item is found, we remove it using the pop() method.
@app.route('/todo/delete', methods=['DELETE'])
def deleteTask():
    req_data = request.get_json()
    for idx, task in enumerate(obj):
        if task.get('task') == req_data["task"]:
            obj.pop(idx)
            return jsonify(req_data)
    return "Item Not Found"
On the front-end, we need to change our TodoList.js. That before updating the list in the front-end, the removeTask() function will send the objects with the item to the server, if the server returns the object we update the list in the front-end. The function that will submit the values to the server is this:
async function deleteData(url = '', data = {}) {
   const response = await fetch(url, {
      method: 'DELETE',
      headers: {
         'Content-Type': 'application/json'
      },
      body: JSON.stringify(data)
   });
   return response.json();
}
And let’s change the removeTask() function to include that function.
const removeTask = async (index, todo) => {
   await deleteData('http://localhost:5000/todo/delete',
      todo)
      .then(data => {
         const updatedList = todos.filter((task, taskIndex) => {
            return taskIndex !== index;
         });
         updateTodos(updatedList);
      })
}
One last detail, we also need to update the delete button, before we were just passing the index, now we also need to pass the todo object.
<button className="button" onClick={() => removeTask(index, todo)}>Delete</button>
We are coming to the end of the project. Last step now, we need to update our list, which in our case is to mark the item as complete or incomplete. Let’s start with our route on our Flask server.
@app.route('/todo/update', methods=['PUT'])
def updateTask():
    req_data = request.get_json()
    for idx, task in enumerate(obj):
        if task.get('task') == req_data["task"]:
            obj.pop(idx)
            obj.insert(idx,req_data)
            break
    return jsonify(req_data)
To not overcomplicate things, what I’m doing is very simple, I look for the item in the list, as soon as I find it, I remove it from the list and insert the same element, with the value I’m receiving from the user, that for this function the only thing that will change is the complete:false/true value.
Now our front-end also follows the same idea as the other functions. We will first create a function to send the data to the server, and as soon as we receive the answer, we will update the front-end.
async function updateData(url = '', data = {}) {
   const response = await fetch(url, {
      method: 'PUT',
      headers: {
         'Content-Type': 'application/json'
      },
      body: JSON.stringify(data)
   });
   return response.json();
}
Precisamos atualizar nossa função markComplete() para enviar o item que queremos atualizar no servidor. Já faço a mudança para complete:false/true no front-end.
We need to update our markComplete() function to send the item we want to update on the server. I already make the change to complete:false/true in the front-end.
const markComplete = async (index, todo) => {
   const updated = { ...todo, complete: !todo.complete }
   await updateData('http://localhost:5000/todo/update',
      updated)
      .then(data => {
         const updatedList = todos.map((item, id) => {
            if (index !== id) return item;
            return updated;
         });
         updateTodos(updatedList);
      })
}
And finally, we need to update the click function, then send the index and the todo object.
...
onClick={() => markComplete(index, todo)}>
...
It’s time, let’s test it. Your application will be working like the one you are seeing in the video below.
As you can see, programming in Python is quite simple. The combination of Python Flask allows us to create simple yet powerful applications.
In this tutorial, we build an API, for a React application. The API service was implemented using a REST-based architecture.
I hope you enjoyed it, if you have any questions, leave them in the comments, I will answer 100% of the comments.
See you next time!
Pretty nice post. I simply stumbled upon your weblog and wished to say that I have truly loved browsing your blog posts. After all I'll be subscribing on your feed and Im hoping you write once more soon!
I have been checking out some of your stories and i can claim pretty good stuff. I will definitely bookmark your website.
reviews over at
I was searching on line for some information since yesterday night and I ultimately found this! This is a cool website by the way, except it is a little bit off place from my i phone.
Wow, that was a great read through. Finally, somebody who really thinks and is familiar with what they are writing about. Quite hard to find these days, especially on the internet. I saved your blog and will make sure to keep coming back here if this is how you always post. Many thanks, keep it up!
Way cool! Some very valid points! I appreciate you penning this article and also the rest of the website is also really good.
I know this is in truth boring and you are skipping to the next comment, but I just wanted to throw you a big thank you - you cleared up some things for me!
I cannot thank you enough for the blog post. Awesome.
F*ckin' amazing issues here. I'm very glad to see your article. Thanks so much and i am taking a look ahead to touch you. Will you please drop me a e-mail?
Leave a Reply